- Home
- Knowledge Base
- Flight Operations
- Performing a check in for your flight
Performing a check in for your flight
The check in operation in Flight Schedule Pro is used to terminate your flight and return the airplane to Leighnor Aircraft. From a flight operations perspective, you’ve landed, taxied back to the aircraft’s hangar or tie-down location and secured the aircraft. You’ve removed all your personal belongings and trash from the aircraft and you’re ready to return the keys. You’ve also carefully noted the aircraft’s Hobbs and tach times.
If the airplane you’re renting is a glass panel aircraft, you may need to capture the Hobbs and tach times prior to shutdown as systems such as the Garmin G300 have those meters internal to the PFD/MFD displays.
Finding your reservation
To do the check in you have to find your existing flight reservation and there are two main ways to find your reservation.
First, when you log in to Flight Schedule Pro, there is an info block with your current reservations right on your dashboard. You can open any existing reservation directly from the info block. Here’s an example of what your reservations will look like on the dashboard info block:
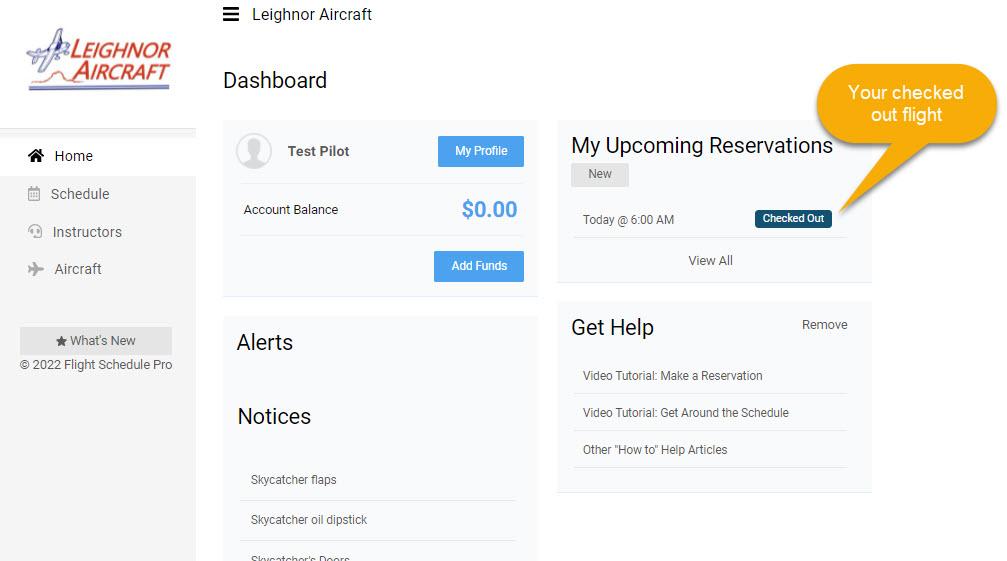
To get the details of the flight, simply hover your mouse over the flight status.
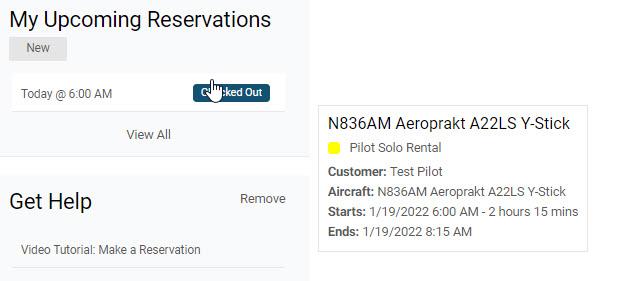
The second method of finding your reservation is to go to the schedule tab and view the schedule. Your reservation will show on the schedule and the same information may be shown my hovering over the reservation.
To open the reservation, simply click on the reservation and the reservation dialog will open.
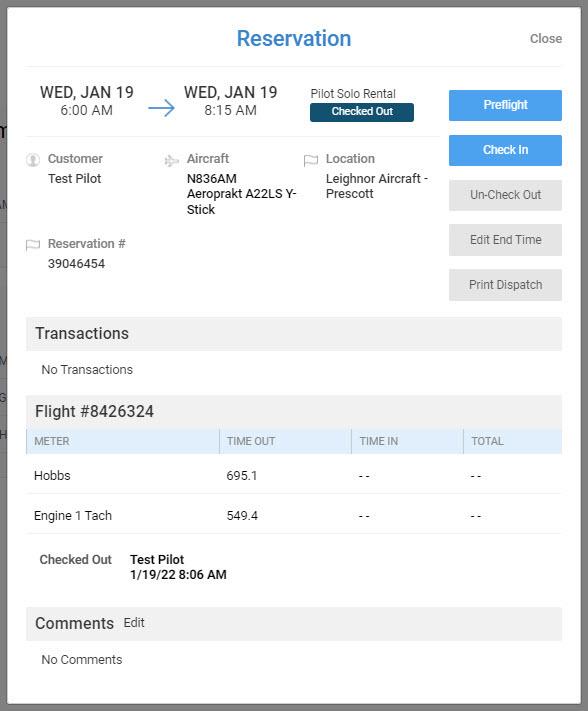
The reservation shows the flight status as “Checked Out” as well as showing your Hobbs and tach times that were in the system and verified as part of the check out process. To start the check in process, click the blue “Check In” button.
Checking in your flight
When you click the blue “Check In” button, the check in dialog will open:
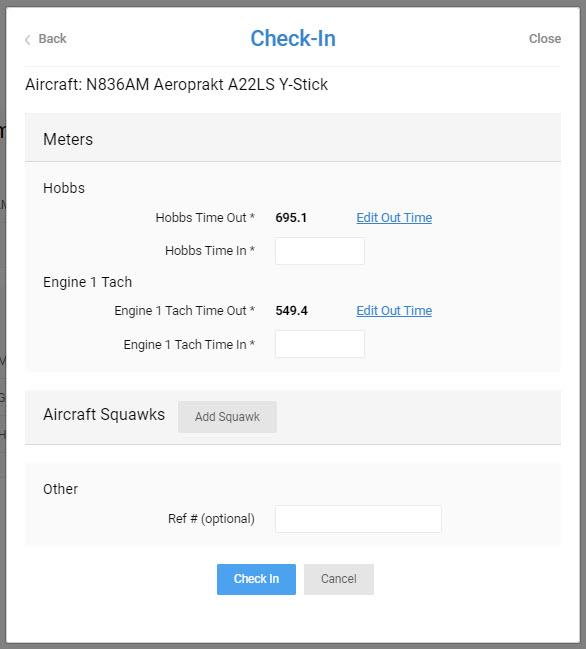
On the check in dialog, you will enter the Hobbs and tach times. You also have the opportunity to enter a single squawk on the aircraft as part of the check in process.
You also have the last opportunity to change the Hobbs time and tach times out. These times should have been reviewed as part of the check out process, but you do have an opportunity to change these times here.
If more than one squawk needs to be entered, a pilot may enter squawks from the Flight Schedule Pro aircraft page.
If you need to change either the Hobbs time out, tach time out or both times, you can click on the “Edit Out Time” link and it will open the out time field for editing.
If an aircraft or simulator only has one meter, then only one time will be shown. If the aircraft is a multi-engine plane with two tach times, there will be three fields to enter.
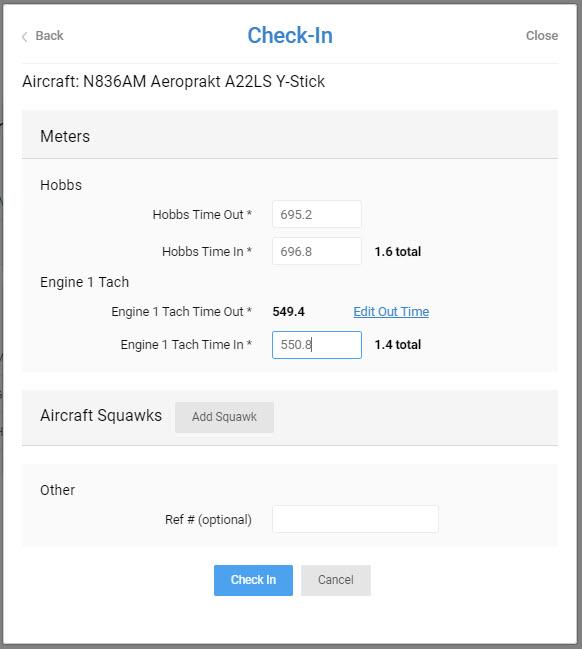
For your flight today, you did need to change the “Hobbs Time Out”, so the “Edit Out Time” link was clicked to open up the “Hobbs Time Out field”. You entered the corrected out time and the “Hobbs Time In” and “Engine 1 Tach Time In” fields. Flight Schedule Pro will automatically calculate the total duration for both times for you.
Why are there two or more times? The Hobbs time is a duration and is the time pilots enter in their logbook. Aircraft maintenance times are logged off tach time if it’s available as this is a metered indication of how long the engine was running and how hard the engine was working. Tach time is always less than Hobbs time and if it isn’t, it’s very likely a mistake has been made.
Adding a squawk on check in
As you’re entering your times, you remember in the preflight that the left tire had a rather nasty bald spot on it, so you click the gray “Add Squawk” button.
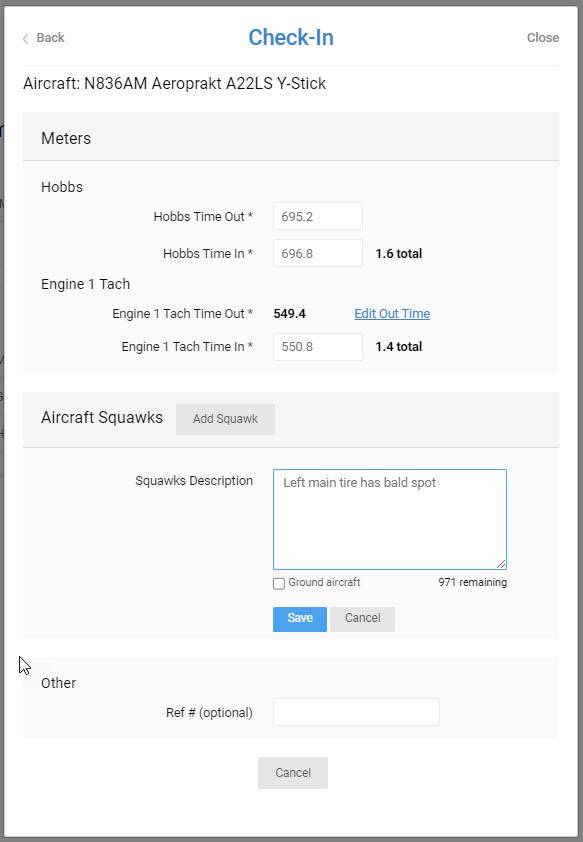
When you click the gray “Add Squawk” button, this opens up the add squawk panel on the check in dialog. You only have two fields to enter, the description of the problem and whether or not the aircraft needs to be grounded. Enter the squawk description and check the box to ground the aircraft if needed. Click the blue “Save” button to save the squawk. Once the squawk is saved, the blue “Check In” button will reappear.
Click the blue “Check In” button to complete the check in process.
Check in process complete
Once you click the blue “Check In” button, the final reservation dialog will display:
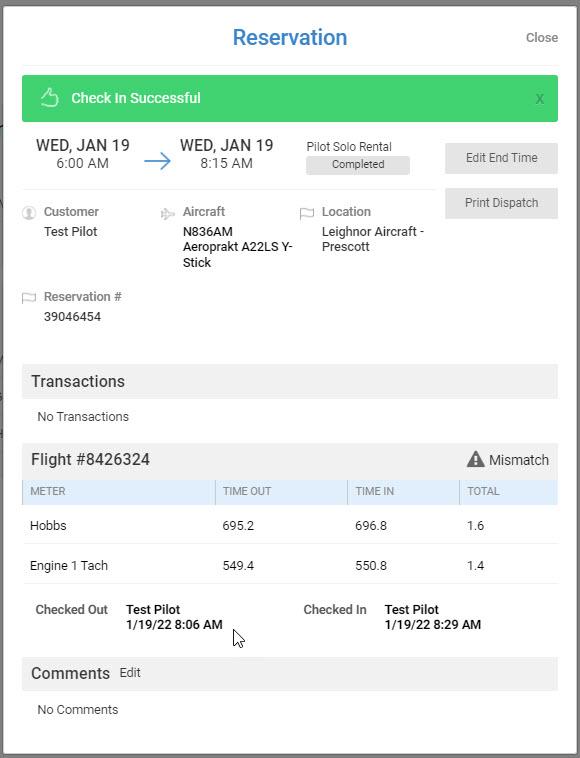
The reservation dialog will redisplay upon successful check in. The times in are now displayed with the calculated totals. There is also a date and time when you checked the flight in.
What’s this “Mismatch” alert for? The mismatch alert will display if there’s a discrepancy between the last flight and your flight. You changed the Hobbs time out as it was not correct, so this causes a .1 discrepancy between your flight and the previous flight.
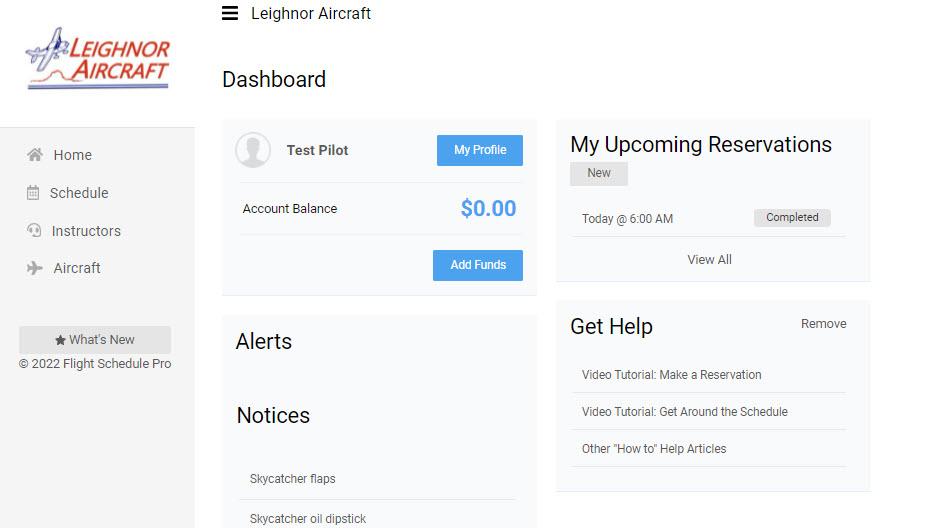
When you go back to your dashboard page, your flight will now display as shown below:
Securing the airplane
When you leave the airplane, please…
- Make sure the aircraft master switch is OFF – a dead battery can incur a costly maintenance event as well as downtime on the aircraft
- Remove all personal belongings from the aircraft
- Remove all trash from the aircraft
- If winter operations are in effect and oil sump heaters are being used, make sure the aircraft is plugged into the heater
- If the aircraft is in a hangar, make sure hangar doors are secured correctly and lights are off in the hangar
- Return the aircraft keys to the appropriate location
- Make sure the flight check in process is completed
- If there are problems or issues noted with the aircraft, PLEASE enter squawks
Squawks – A squawk is a problem in the airplane. It can be something simple like a bald spot on a tire that looks bad or something severe that grounds the airplane such as a flat tire or dead battery. We ask that pilots please enter squawks when they notice a problem because if Leighnor Aircraft doesn’t know about the problem, we can’t fix the problem!
